
- August 28, 2025
- Mins Read
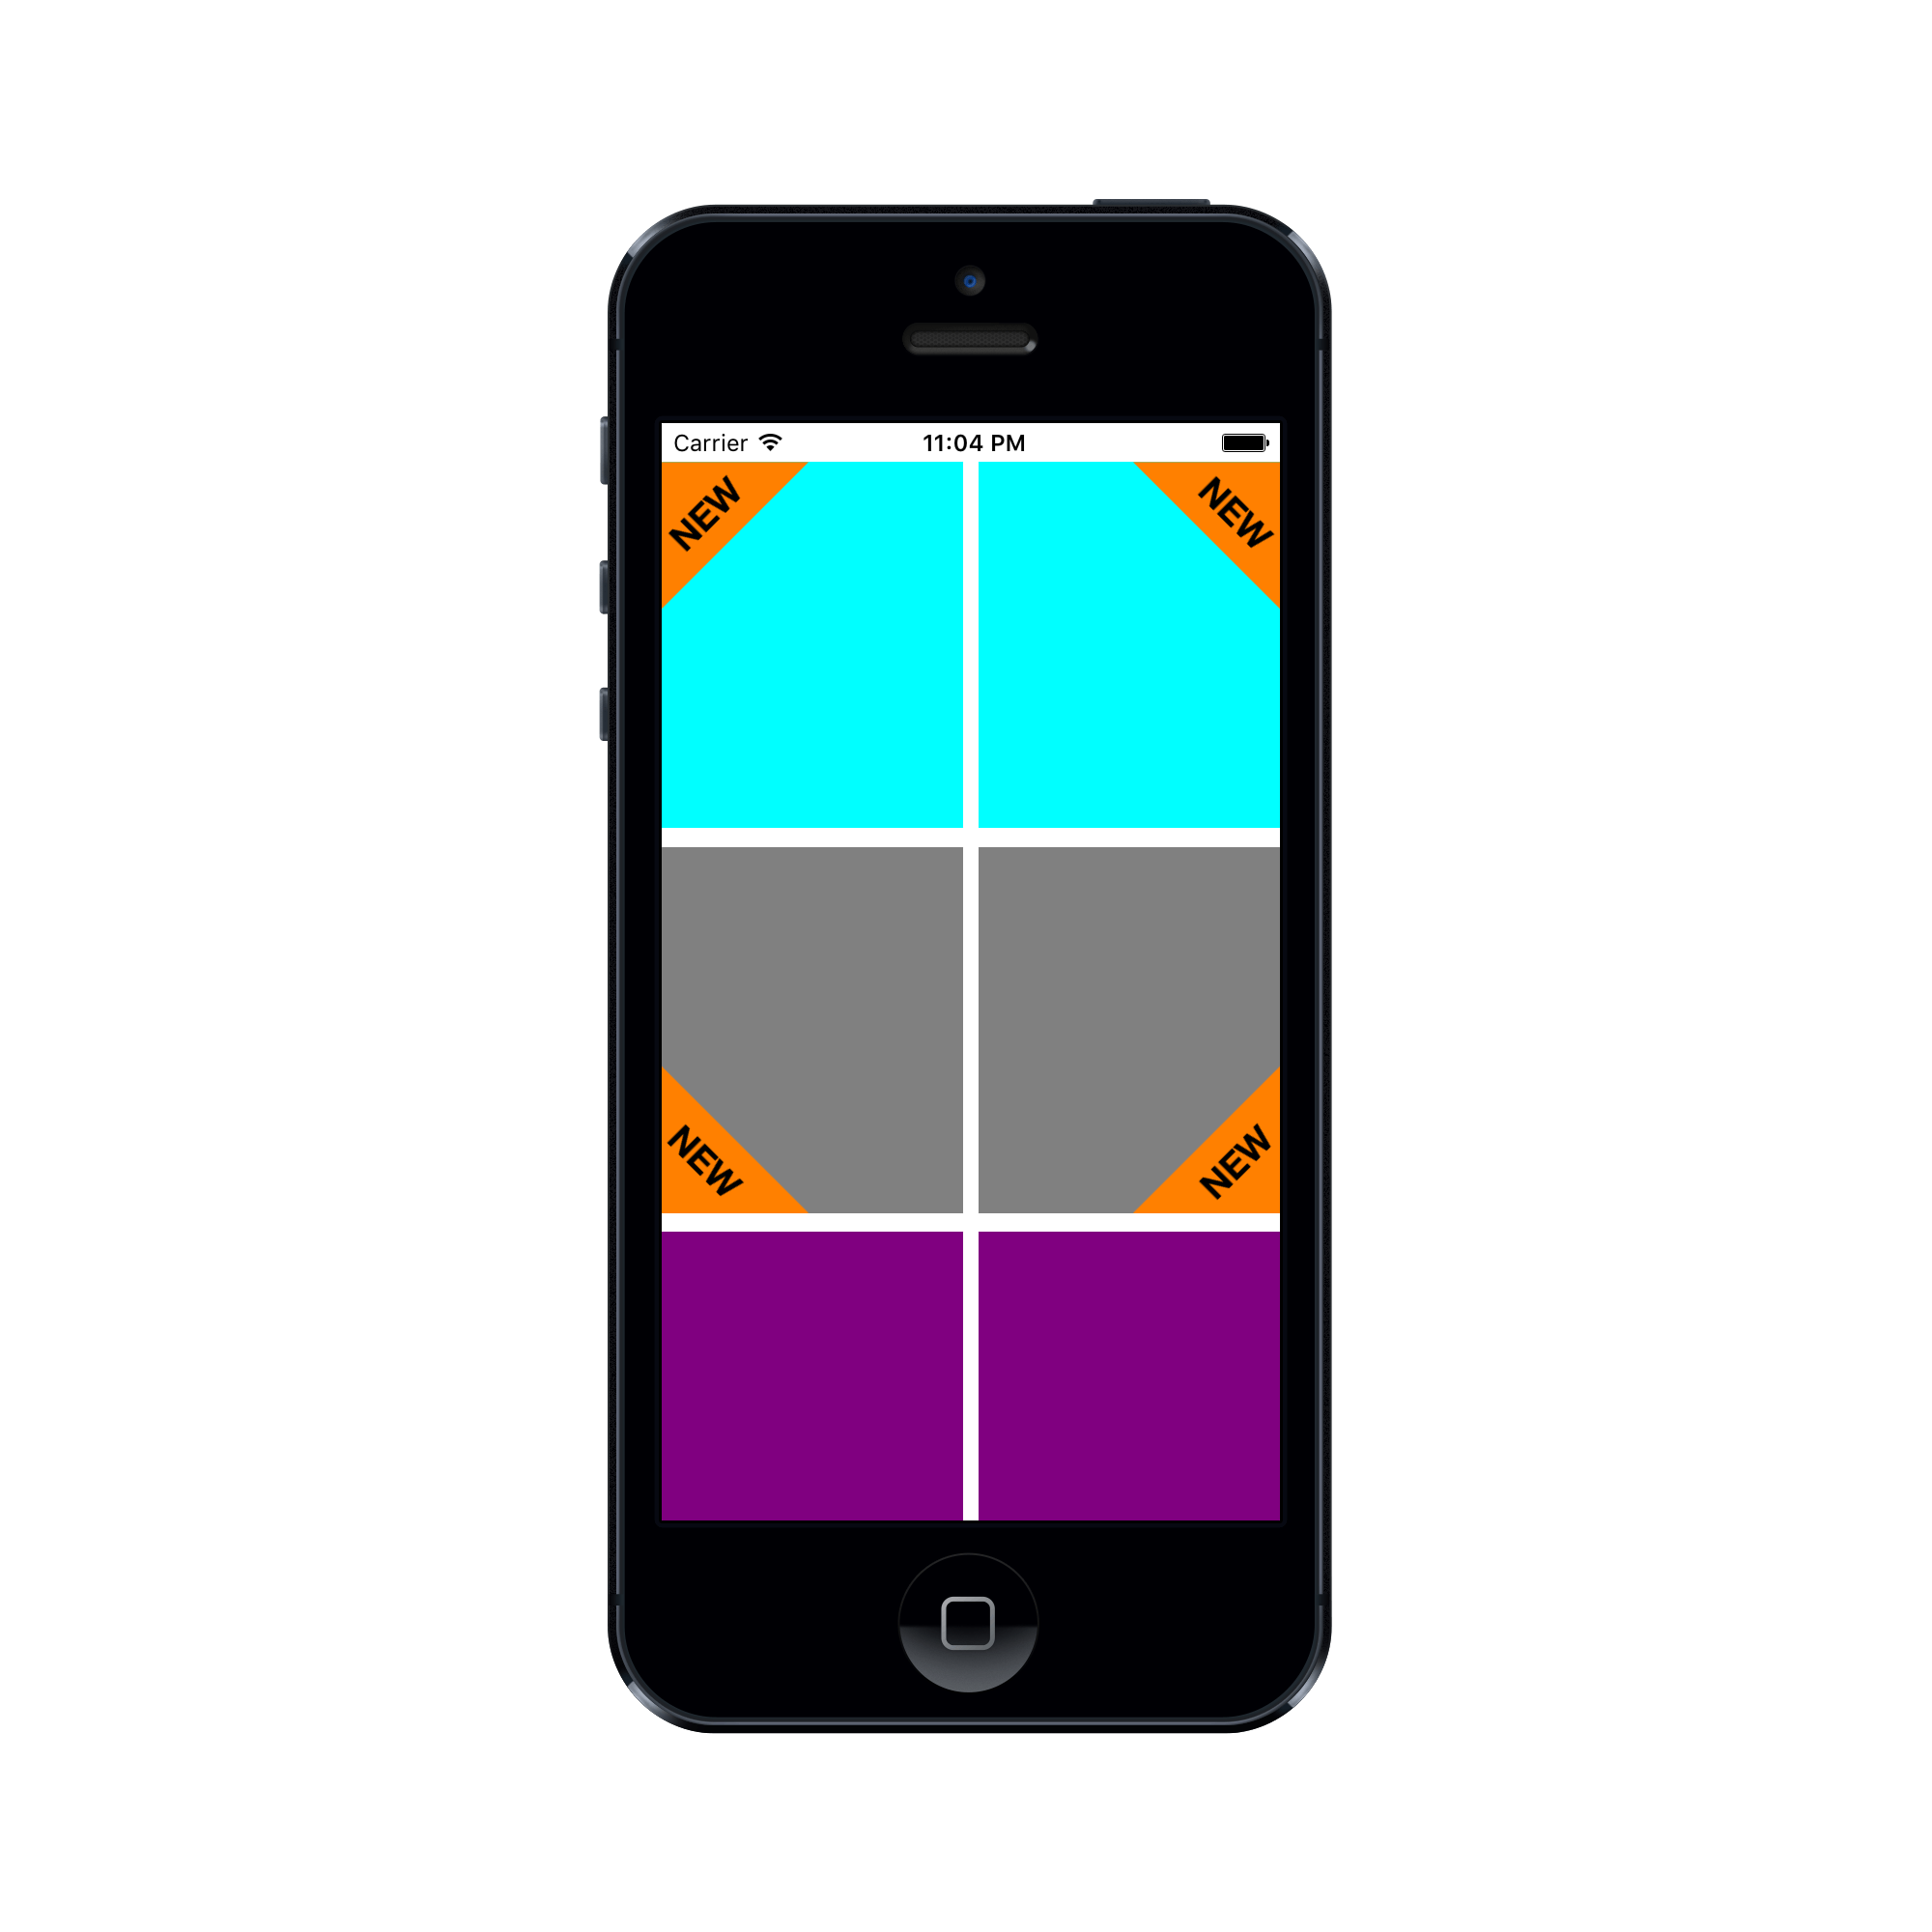
A triangle shaped corner label view for iOS written in Swift.
- This view is a subclass of UIView.
- It can be created and customized from the Storyboard or from the code

Setup with CocoaPods
If you are using CocoaPods add this text to your Podfile and run pod install.
                                                use_frameworks!

target ‘Your target name’

pod ‘TriLabelView’
Or Add source
Simply add TriLabelView.swift file to you project.
Usage
Creating a view form the code
                                                let triLabelView = TriLabelView(frame:CGRect)

view.addSubview(triLabelView)
Customization
// Change Text
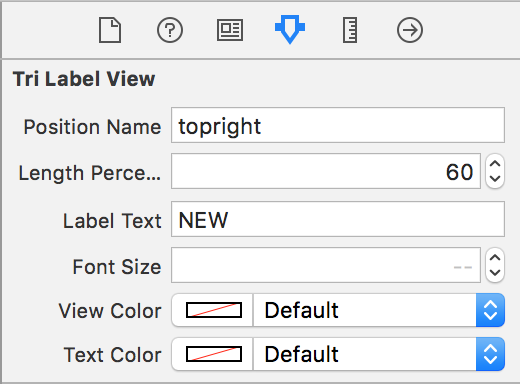
triLabelView.labelText = “NEW”
// Adjust Length Percentage
// You can update this to set percentage value of this
// view to that of the superview.
// Default value is 50.0
triLabelView.lengthPercentage = 60.0
You can set the position of view with .TopLeft being the default. The following positions are available
                                                public enum Position:String {

case TopLeft

case TopRight

case BottomRight

case BottomLeft

}
You can update text color, font and background color
                                                triLabelView.textColor = UIColor.yellowColor()
triLabelView.labelFont = UIFont.systemFont(ofSize: 15)
triLabelView.viewColor = UIColor.brownColor()
Creating a view form the storyboard
-
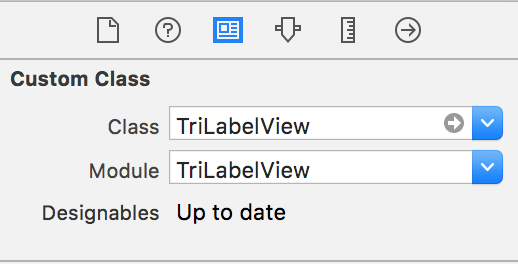
If you already have a view where you want to use then set it’s
classtoTriLabelViewin identity inspector. -
Or drag a View from object library and then change it’s
classtoTriLabelViewin identity inspector. -
Set the
moduleproperty toTriLabelView.
- Customize the view properties in the attributes inspector.
Requirements
- Swift 3 / Xcode 8
- iOS 9.3
GitHub
#cocoapods #ios #swift #uicomponents
YOU MIGHT ALSO LIKE...

- August 27, 2025
- SwiftUI
This package provides you with an easy way to show tooltips over any SwiftUI view, since Apple does not provide ...
- August 27, 2025
- SwiftUI
- Uncategorized
SimpleToast is a simple, lightweight, flexible and easy to use library to show toasts / popup notifications inside iOS or ...
- August 27, 2025
- SwiftUI
Create Toast Views with Minimal Effort in SwiftUI Using SSToastMessage. SSToastMessage enables you to effortlessly add toast notifications, alerts, and ...

- August 27, 2025
- Mins Read
- August 27, 2025
- Mins Read
- August 27, 2025
- Mins Read
- August 22, 2025
- Mins Read
