- August 28, 2025
- Mins Read
Drawer view controller that is easy to use!
Installation
CocoaPods (iOS 8+ projects)
KWDrawerController is available on CocoaPods. Add the following to your Podfile:
                                                # Swift 3

pod ‘KWDrawerController’, ‘~> 3.7’
# Swift 4~

pod ‘KWDrawerController’, ‘~> 4.2’

pod ‘KWDrawerController/RxSwift’ # with RxSwift extension
Manually
Simply drag and drop the DrawerController folder into your existing project.
Usage
Code
                                                import UIKit
import KWDrawerController
@UIApplicationMain

class AppDelegate: UIResponder, UIApplicationDelegate {
var window: UIWindow?
func application(application: UIApplication, didFinishLaunchingWithOptions launchOptions: [NSObject: AnyObject]?) -> Bool {
let mainViewController = MainViewController()

let leftViewController = LeftViewController()

let rightViewController = RightViewController()
let drawerController = DrawerController()
drawerController.setViewController(mainViewController, .none)

drawerController.setViewController(leftViewController, .left)

drawerController.setViewController(rightViewController, .right)
/// Customizing
window = UIWindow(frame: UIScreen.mainScreen().bounds)

window?.rootViewController = drawerController

window?.makeKeyAndVisible()
return true

}

}
Storyboard

-
Set
DrawerControlleras the Custom Class of the Initial ViewController. -
Connect the
DrawerEmbedLeftControllerSegueand/or theDrawerEmbedRightControllerSeguefromDrawerControllerto your left/right controllers. -
Connect the
DrawerEmbedMainControllerSeguefromDrawerControllerto your main controller. -
Set the segue identifiers of both the inspector of
DrawerControllerand the segues themselves.
Open / Close
                                                /// Open

self.drawerController?.openSide(.left)

self.drawerController?.openSide(.right)
/// Close

self.drawerController?.closeSide()
Delegate
                                                optional func drawerDidAnimation(

drawerController: DrawerController,

side: DrawerSide,

percentage: Float

)
optional func drawerDidBeganAnimation(

drawerController: DrawerController,

side: DrawerSide

)
optional func drawerWillFinishAnimation(

drawerController: DrawerController,

side: DrawerSide

)
optional func drawerWillCancelAnimation(

drawerController: DrawerController,

side: DrawerSide

)
optional func drawerDidFinishAnimation(

drawerController: DrawerController,

side: DrawerSide

)
optional func drawerDidCancelAnimation(

drawerController: DrawerController,

side: DrawerSide

)
Customizing
Transition
DrawerTransition is a module that determines the rendering direction to move the Drawer. It is implemented by inheriting DrawerTransition.
- DrawerSlideTransition
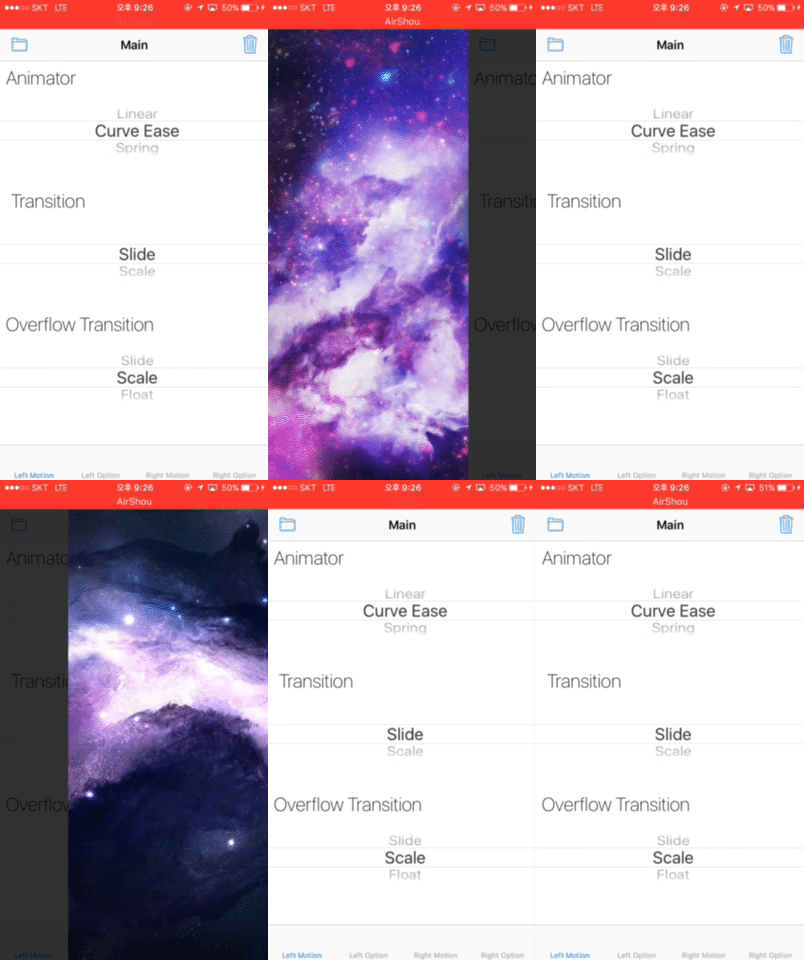
- DrawerScaleTransition
- Use is not recommended.
- DrawerParallaxTransition
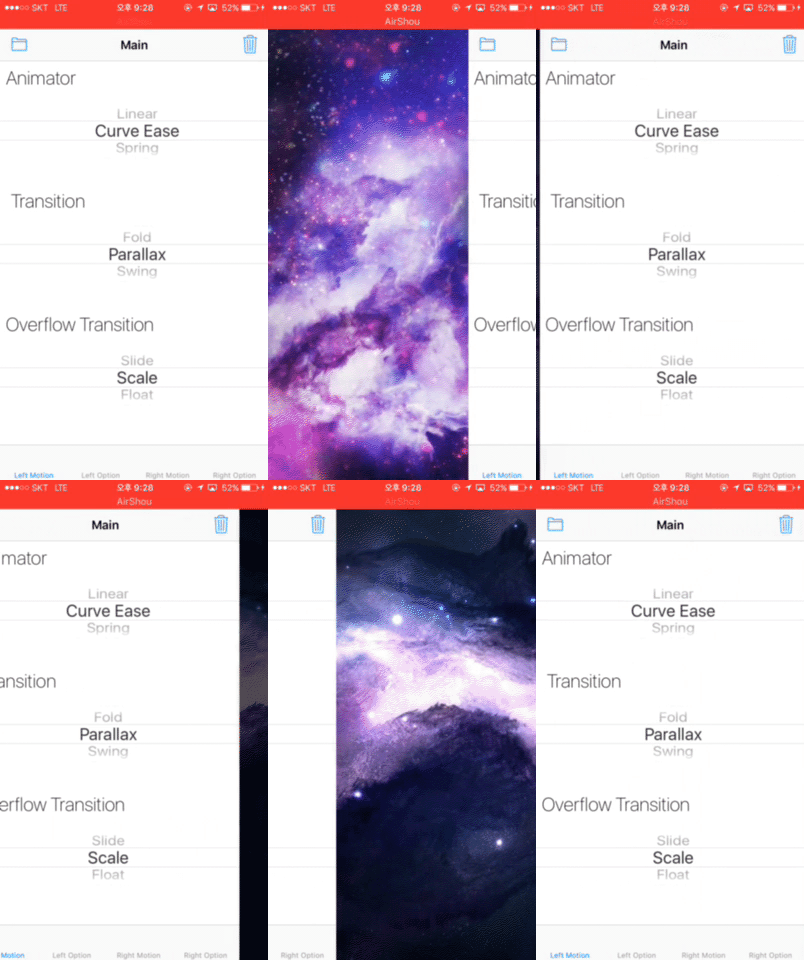
- DrawerFloatTransition
- When using the
Transition,Overflow Transitionshould also useDrawerFloatTransition.
- When using the
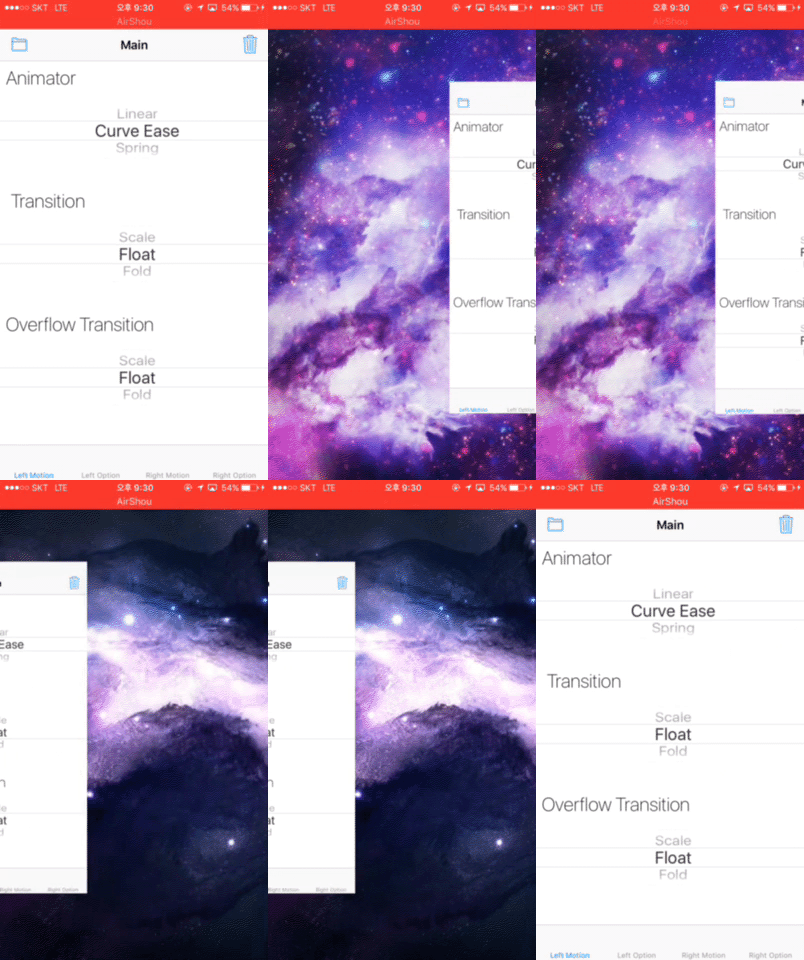
- DrawerFoldTransition

- DrawerSwingTransition
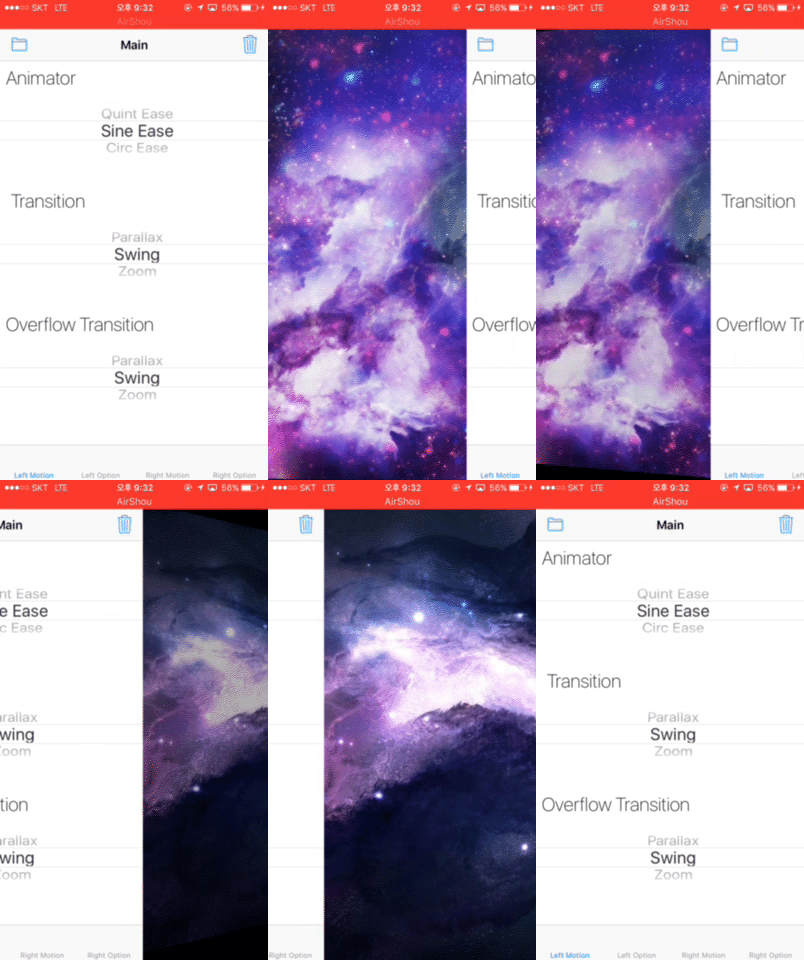
- DrawerZoomTransition
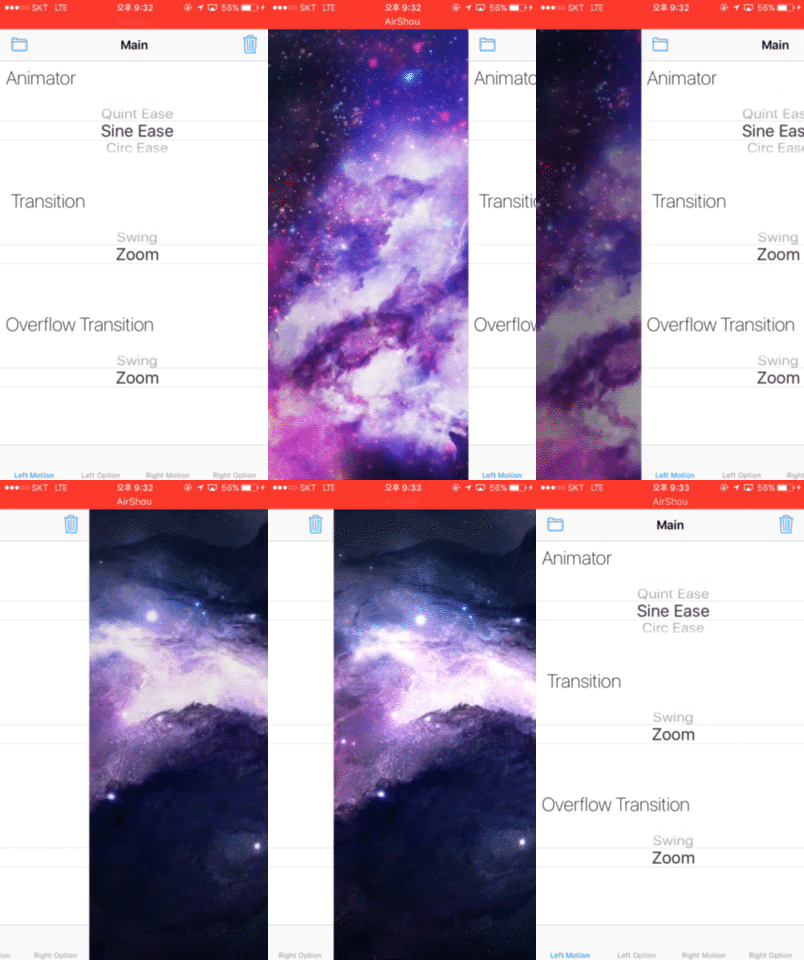
Overflow Transition
Overflow Transition be used when Transition beyond the open range of the drawer.
- DrawerSlideTransition
- DrawerScaleTransition
- This is natural when used with
DrawerSlideTransition,DrwaerParallaxTransition,DrawerFoldTransition, andDrawerSwingTransition.
- This is natural when used with
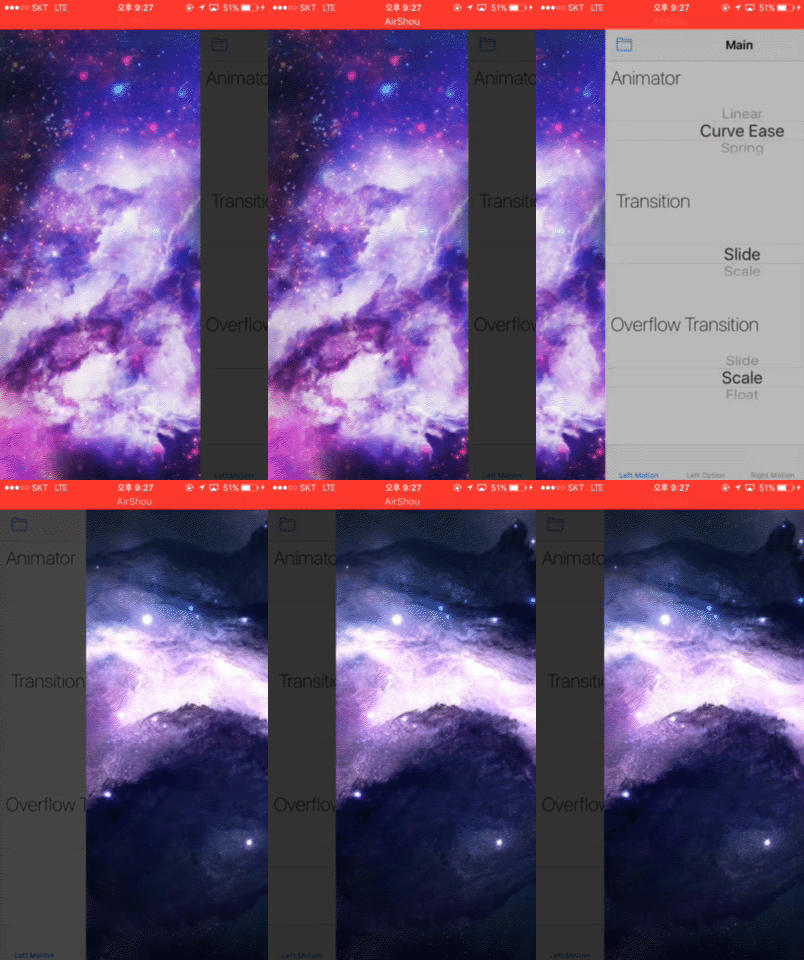
- DrawerParallaxTransition
- DrawerFloatTransition
- When using the
Overflow Transition,Transitionshould also useDrawerFloatTransition.
- When using the
- DrawerFoldTransition
- Use is not recommended.
- DrawerSwingTransition
- Use is not recommended.
- DrawerZoomTransition
Animator
Animator is a module that controls the speed of moving a drawer. It is implemented by inheriting DrawerAnimator or DrawerTickAnimator.
- DrawerLinearAnimator
- DrawerCurveEaseAnimator
- DrawerSpringAnimator
- DrawerCubicEaseAnimator
- DrawerQuadEaseAnimator
- DrawerQuartEaseAnimator
- DrawerQuintEaseAnimator
- DrawerCircEaseAnimator
- DrawerExpoEaseAnimator
- DrawerSineEaseAnimator
- DrawerElasticEaseAnimator
- DrawerBackEaseAnimator
- DrawerBounceEaseAnimator
Options
                                                public var isTapToClose: Bool

public var isGesture: Bool

public var isAnimation: Bool

public var isOverflowAnimation: Bool

public var isShadow: Bool

public var isFadeScreen: Bool

public var isBlur: Bool

public var isEnable: Bool
Changelog
- 1.0 First Release.
- 1.1 Bug Fix, Add animations.
- 2.0 Refactoring.
- 2.1 Bug Fix, Update animation.
- 2.2 Fix animation, and some bugs.
- 3.0 Written in Swift 3.0
- 3.1 Fix Access Control issues on DrawerController.
- 3.2 Fix Access Control issues on Transition.
- 3.3 Fix Access Control issues on initializer.
- 3.4 Remove debug log.
- 3.5 Fixed bug where touch ignores is not applied for “Absolute Controller”.
- 3.6 Fixed an occurs issue while the drawer was open and layout changing.
- 3.6.1 Fixed layout issue when rotate device.
- 3.7 Fixed not updating issues on properties.
- 4.0 Support Swift 4.
- 4.1 Implement new flag that enables direction auto-switching.
- 4.1.1 Support RxSwift(If you want).
- 4.1.2
- Fix issues on auto layout of child view controllers.
- Replace naming.
- Implement
getViewControllermethod. - Reduce cloning size.
- 4.1.3
- Fix crashed on load. (#12)
- 4.1.4
- Add state methods to delegate. (#16)
- Fix access control issues. (#18)
- Fixed DrawerFloatTransition bug. (#20)
- DrawerController incorrectly manages lifecycles of child controllers. (#21 #22)
- 4.1.5
- Code and performance improvements and bug fixes. (#24 @rivera-ernesto)
- 4.1.6
- Fix transition bugs.
- Fix gesture not working bugs.
- Fix right drawer placement on iPads (#28 @rivera-ernesto)
- 4.2
- Support swift 4.2. (#31)
⚠️ Requirements
- iOS 8.0+
- Swift 3.0+
GitHub
- August 27, 2025
- SwiftUI
This package provides you with an easy way to show tooltips over any SwiftUI view, since Apple does not provide ...
- August 27, 2025
- SwiftUI
- Uncategorized
SimpleToast is a simple, lightweight, flexible and easy to use library to show toasts / popup notifications inside iOS or ...
- August 27, 2025
- SwiftUI
Create Toast Views with Minimal Effort in SwiftUI Using SSToastMessage. SSToastMessage enables you to effortlessly add toast notifications, alerts, and ...


