- August 28, 2025
- Mins Read
Simple countdown UILabel with morphing animation, and some useful function.
Features
- Simple creation
- Easily get status of countdown from property and delegate.
- Insert some of function, and completion
- Style change as usual as UILabel do
- Morphing animation from LTMorphingLabel.
- XCTest assertion
Version vs Swift version
Below is a table that shows which version of what you should use for your Swift version.
| Swift version | version |
|---|---|
| 4.2 | >= 4.0 |
| 4.0, 4.1 | >= 3.0 |
| 3.X | >= 2.0 |
| 2.3 | 1.3 |
Usage
You need only 2 lines.
                                                // from current Date, after 30 minutes.

let countdownLabel = CountdownLabel(frame: frame, minutes: 30) // you can use NSDate as well

countdownLabel.start()
Morphing example
Use animationType. Those effect comes from LTMorphingLabel.
                                                let countdownLabel = CountdownLabel(frame: CGRectZero, time: 60*60)

countdownLabel.animationType = .Pixelate

countdownLabel.start()
| morphing effect | example |
|---|---|
| .Burn |  |
| .Evaporate |  |
| .Fall |  |
| .Pixelate | |
| .Scale |  |
| .Sparkle |  |
Style
you can directly allocate it as a UILabel property just like usual.
                                                countdownLabel.textColor = .orangeColor()

countdownLabel.font = UIFont(name:”Courier”, size:UIFont.labelFontSize())

countdownLabel.start()

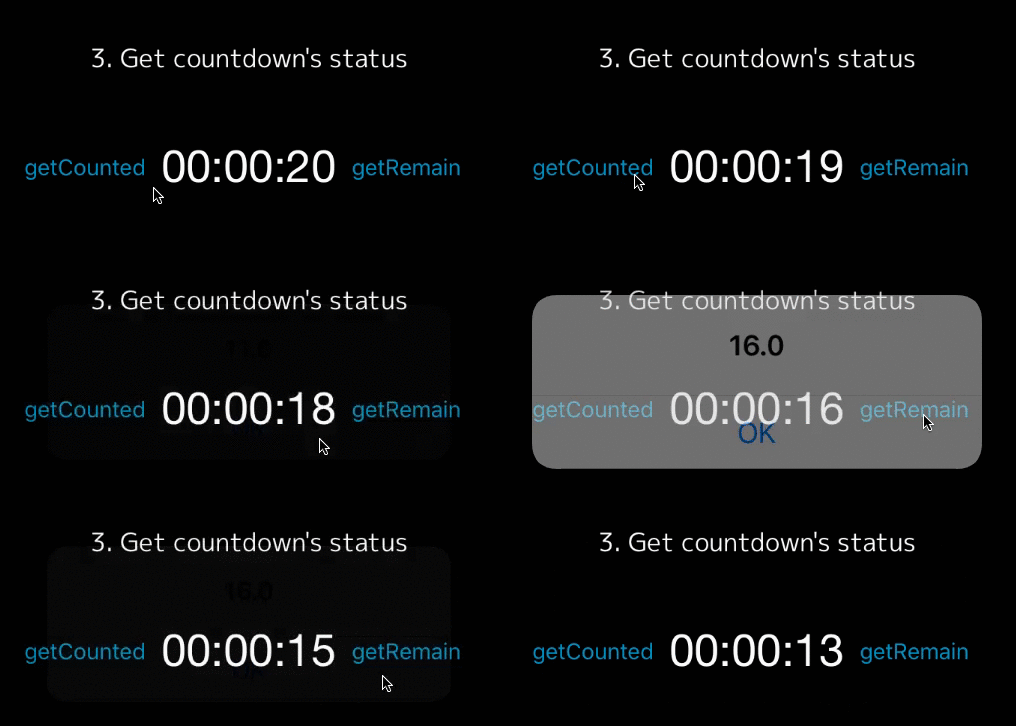
Get Status of timer
there’s some property for reading status.
                                                countdownLabel.timeCounted // timer that has been counted

countdownLabel.timeRemaining // timer’s remaining
// example

@IBAction func getTimerCounted(sender: UIButton) {

debugPrint(“\(countdownLabel.timeCounted)”)

}
@IBAction func getTimerRemain(sender: UIButton) {

debugPrint(“\(countdownLabel.timeRemaining)”)

}

Control countdown
You can pause, start, change time.
                                                // check if pause or not

if countdownLabel.isPaused {

// timer start

countdownLabel.start()

} else {

// timer pause

countdownLabel.pause()

}
                                                // -2 minutes for ending

@IBAction func minus(btn: UIButton) {

countdownLabel.addTime(-2)

}
// +2 minutes for ending

@IBAction func plus(btn: UIButton) {

countdownLabel.addTime(2)

}

Insert Function
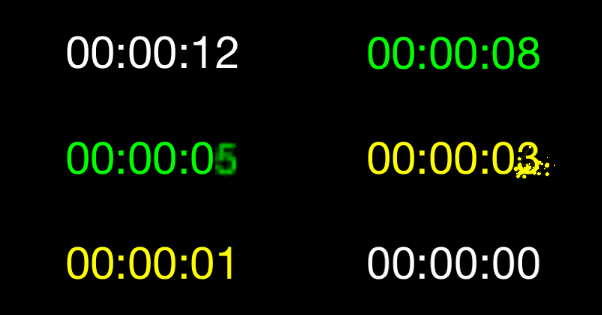
Using then function or delegate, you can set your function anywhere you like.
                                                // then property

countdownLabel.then(10) { [unowned self] in

self.countdownLabel.animationType = .Pixelate

self.countdownLabel.textColor = .greenColor()

}

countdownLabel.then(5) { [unowned self] in

self.countdownLabel.animationType = .Sparkle

self.countdownLabel.textColor = .yellowColor()

}

countdownLabel.start() {

self.countdownLabel.textColor = .whiteColor()

}
// delegate

func countingAt(timeCounted timeCounted: NSTimeInterval, timeRemaining: NSTimeInterval) {

switch timeRemaining {

case 10:

self.countdownLabel6.animationType = .Pixelate

self.countdownLabel6.textColor = .greenColor()

case 5:

self.countdownLabel6.animationType = .Sparkle

self.countdownLabel6.textColor = .yellowColor()

default:

break

}

}

func countdownFinished() {

self.countdownLabel.textColor = .whiteColor()

}

Attributed Text
you can set as attributedText too. note:but morphing animation will be disabled.
                                                countdownLabel.setCountDownTime(30)

countdownLabel.timeFormat = “ss”

countdownLabel.countdownAttributedText = CountdownAttributedText(text: “timer HERE in text”, replacement: “HERE”)

countdownLabel.start()

Format
Don’t specified over 24 hours or you’ll get wrong format. CountdownLabel uses 00:00:00 (HH:mm:ss) as default format. if you prefer using another format, Your can set your time format like below.
countdownLabel.timeFormat = @"mm:ss"
Scheduled
you can set scheduled timer
                                                // after 10 minutes will start a countdown from 20.

let fromDate = NSDate().dateByAddingTimeInterval(10)

let targetDate = fromDate.dateByAddingTimeInterval(20)

let countdownLabel = CountdownLabel(frame: CGRectZero, fromDate: fromDate, targetDate: targetDate)

countdownLabel.start()
Check Status
some public properties are useful.
                                                countdownLabel.isCounting // check timer is counting now

countdownLabel.isPaused // check timer was stopped

countdownLabel.isFinished // check timer has ended

countdownLabel.morphingEnabled // check morphing is enabled
Requirements
- iOS 9.0+
- Swift 2.3+
- ARC
##Installation
####CocoaPods available on CocoaPods. Just add the following to your project Podfile:
                                                pod ‘CountdownLabel’

use_frameworks!
####Carthage To integrate into your Xcode project using Carthage, specify it in your Cartfile:
github “suzuki-0000/CountdownLabel”
Inspirations
- LTMorphingLabel is motivation for creating this.
- In many reference from MZTimerLabel.
GitHub
- August 27, 2025
- SwiftUI
This package provides you with an easy way to show tooltips over any SwiftUI view, since Apple does not provide ...
- August 27, 2025
- SwiftUI
- Uncategorized
SimpleToast is a simple, lightweight, flexible and easy to use library to show toasts / popup notifications inside iOS or ...
- August 27, 2025
- SwiftUI
Create Toast Views with Minimal Effort in SwiftUI Using SSToastMessage. SSToastMessage enables you to effortlessly add toast notifications, alerts, and ...


