- August 28, 2025
- Mins Read
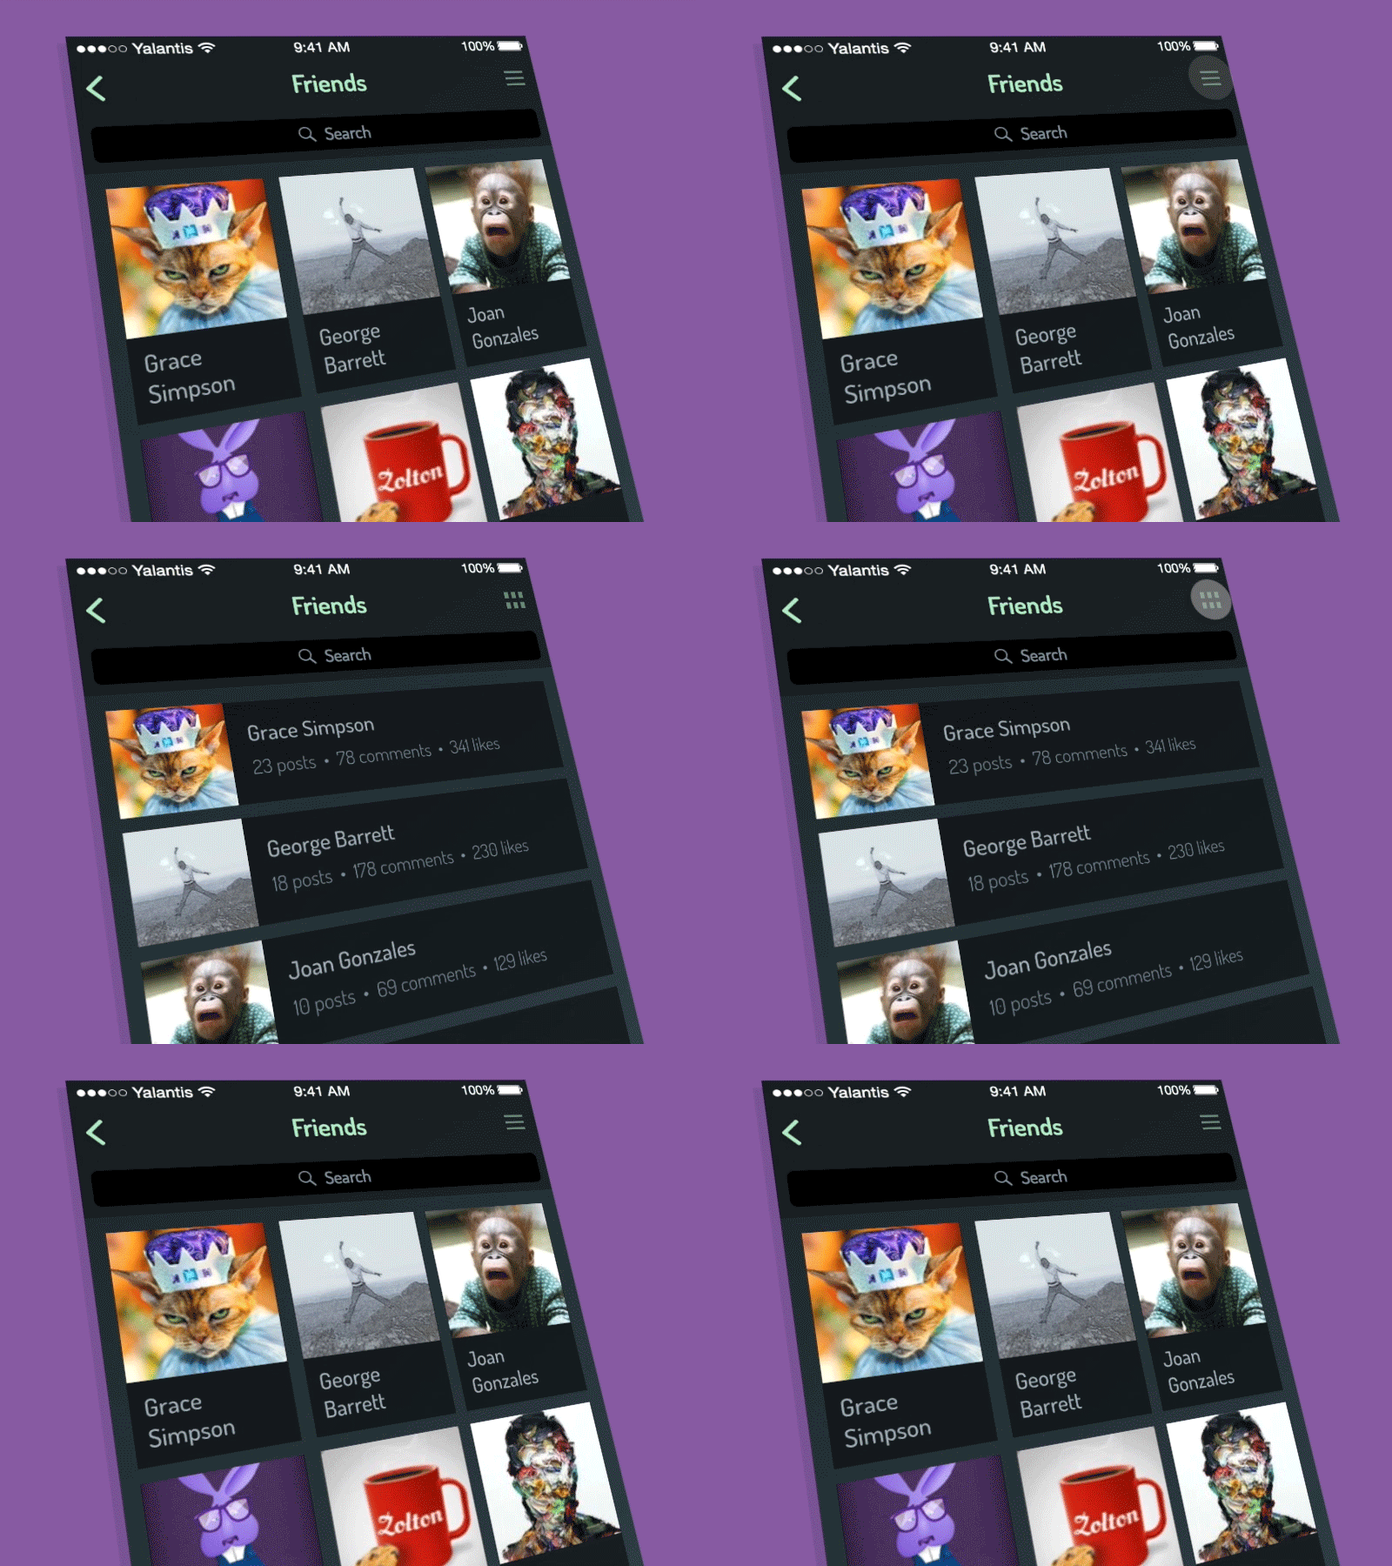
We designed a UI that allows users to switch between list and grid views on the fly and choose the most convenient display type. List view usually provides more details about each user or contact. Grid view allows more users or contacts to appear on the screen at the same time.
We created design mockups for both list and grid views using Sketch. As soon as the mockups were ready, we used Principle to create a smooth transition between the two display types. Note that the hamburger menu changes its appearance depending on which view is activated:
Requirements
- iOS 10.0+
- Xcode 11
- Swift 5
Installing
CocoaPods
                                                use_frameworks!

pod ‘DisplaySwitcher’, ‘~> 2.0’
Carthage
github “Yalantis/DisplaySwitcher” “master”
Use Cases
You can use our Contact Display Switch for:
- Social networking apps
- Dating apps
- Email clients
- Any other app that features list of friends or contacts
Our DisplaySwitcher component isn’t limited to friends and contacts lists. It can work with any other content too.
Usage
At first, import DisplaySwitcher:
import DisplaySwitcher
Then create two layouts (list mode and grid mode):
                                                private lazy var listLayout = DisplaySwitchLayout(staticCellHeight: listLayoutStaticCellHeight, nextLayoutStaticCellHeight: gridLayoutStaticCellHeight, layoutState: .list)
private lazy var gridLayout = DisplaySwitchLayout(staticCellHeight: gridLayoutStaticCellHeight, nextLayoutStaticCellHeight: listLayoutStaticCellHeight, layoutState: .grid)
Set current layout:
                                                private var layoutState: LayoutState = .list

collectionView.collectionViewLayout = listLayout
Then override two UICollectionViewDataSource methods:
                                                func collectionView(collectionView: UICollectionView, numberOfItemsInSection section: Int) -> Int {

// count of items

}
func collectionView(collectionView: UICollectionView, cellForItemAtIndexPath indexPath: NSIndexPath) -> UICollectionViewCell {

// configure your custom cell

}
Also override one UICollectionViewDelegate method (for custom layout transition):
                                                func collectionView(collectionView: UICollectionView, transitionLayoutForOldLayout fromLayout: UICollectionViewLayout, newLayout toLayout: UICollectionViewLayout) -> UICollectionViewTransitionLayout {

let customTransitionLayout = TransitionLayout(currentLayout: fromLayout, nextLayout: toLayout)

return customTransitionLayout

}
And in the end necessary create transition and start it (you can simply change animation duration for transition layout and for rotation button):
                                                let transitionManager: TransitionManager

if layoutState == .list {

layoutState = .grid

transitionManager = TransitionManager(duration: animationDuration, collectionView: collectionView!, destinationLayout: gridLayout, layoutState: layoutState)

} else {

layoutState = .list

transitionManager = TransitionManager(duration: animationDuration, collectionView: collectionView!, destinationLayout: listLayout, layoutState: layoutState)

}

transitionManager.startInteractiveTransition()

rotationButton.selected = layoutState == .list

rotationButton.animationDuration = animationDuration
Under the hood
We use five classes to implement our DisplaySwitcher:
BaseLayout
In the BaseLayout class, we use methods for building list and grid layouts. But what’s most interesting here is the сontentOffset calculation that should be defined after the transition to a new layout.
First, save the сontentOffset of the layout you are switching from:
                                                override func prepareForTransitionFromLayout(oldLayout: UICollectionViewLayout) {

previousContentOffset = NSValue(CGPoint:collectionView!.contentOffset)

return super.prepareForTransitionFromLayout(oldLayout)
}
Then, calculate the сontentOffset for the new layout in the targetContentOffsetForProposedContentOffset method:
                                                override func targetContentOffsetForProposedContentOffset(proposedContentOffset: CGPoint) -> CGPoint {

let previousContentOffsetPoint = previousContentOffset?.CGPointValue()

let superContentOffset = super.targetContentOffsetForProposedContentOffset(proposedContentOffset)

if let previousContentOffsetPoint = previousContentOffsetPoint {

if previousContentOffsetPoint.y == 0 {

return previousContentOffsetPoint

}

if layoutState == CollectionViewLayoutState.ListLayoutState {

let offsetY = ceil(previousContentOffsetPoint.y + (staticCellHeight * previousContentOffsetPoint.y / nextLayoutStaticCellHeight) + cellPadding)

return CGPoint(x: superContentOffset.x, y: offsetY)

} else {

let realOffsetY = ceil((previousContentOffsetPoint.y / nextLayoutStaticCellHeight * staticCellHeight / CGFloat(numberOfColumns)) – cellPadding)

let offsetY = floor(realOffsetY / staticCellHeight) * staticCellHeight + cellPadding

return CGPoint(x: superContentOffset.x, y: offsetY)

}

}

return superContentOffset

}
And then clear value of variable in method finalizeLayoutTransition:
                                                override func finalizeLayoutTransition() {

previousContentOffset = nil

super.finalizeLayoutTransition()

}
BaseLayoutAttributes
In the BaseLayoutAttributes class, a few custom attributes are added:
                                                var transitionProgress: CGFloat = 0.0

var nextLayoutCellFrame = CGRectZero

var layoutState: CollectionViewLayoutState = .ListLayoutState
transitionProgress is the current value of the animation transition that varies between 0 and 1. It’s needed for calculating constraints in the cell.
nextLayoutCellFrame is a property that returns the frame of the layout you switch to. It’s also used for the cell layout configuration during the process of transition.
layoutState is the current state of the layout.
TransitionLayout
The TransitionLayout class overrides two UICollectionViewLayout methods:
layoutAttributesForElementsInRect and
layoutAttributesForItemAtIndexPath, where we set properties values for the class BaseLayoutAttributes.
TransitionManager
The TransitionManager class uses the UICollectionView’sstartInteractiveTransitionToCollectionViewLayout method, where you point the layout it must switch to:
                                                func startInteractiveTransition() {

UIApplication.sharedApplication().beginIgnoringInteractionEvents()

transitionLayout = collectionView.startInteractiveTransitionToCollectionViewLayout(destinationLayout, completion: { success, finish in

if success && finish {

self.collectionView.reloadData()

UIApplication.sharedApplication().endIgnoringInteractionEvents()

}

}) as! TransitionLayout

transitionLayout.layoutState = layoutState

createUpdaterAndStart()

}
CADisplayLink class
This class is used to control animation duration. This class helps calculate the animation progress depending on the animation duration preset:
                                                private func createUpdaterAndStart() {

start = CACurrentMediaTime()

updater = CADisplayLink(target: self, selector: Selector(“updateTransitionProgress”))

updater.frameInterval = 1

updater.addToRunLoop(NSRunLoop.currentRunLoop(), forMode: NSRunLoopCommonModes)

}
dynamic func updateTransitionProgress() {

var progress = (updater.timestamp – start) / duration

progress = min(1, progress)

progress = max(0, progress)

transitionLayout.transitionProgress = CGFloat(progress)
transitionLayout.invalidateLayout()

if progress == finishTransitionValue {

collectionView.finishInteractiveTransition()

updater.invalidate()

}

}
That’s it! Use our DisplaySwitcher in any way you like! Check it out on Dribbble.
Let us know!
We’d be really happy if you sent us links to your projects where you use our component. Just send an email to github@yalantis.com And do let us know if you have any questions or suggestion regarding the animation.
P.S. We’re going to publish more awesomeness wrapped in code and a tutorial on how to make UI for iOS (Android) better than better. Stay tuned!
GitHub
- August 27, 2025
- SwiftUI
This package provides you with an easy way to show tooltips over any SwiftUI view, since Apple does not provide ...
- August 27, 2025
- SwiftUI
- Uncategorized
SimpleToast is a simple, lightweight, flexible and easy to use library to show toasts / popup notifications inside iOS or ...
- August 27, 2025
- SwiftUI
Create Toast Views with Minimal Effort in SwiftUI Using SSToastMessage. SSToastMessage enables you to effortlessly add toast notifications, alerts, and ...


