- August 28, 2025
- Mins Read
Description
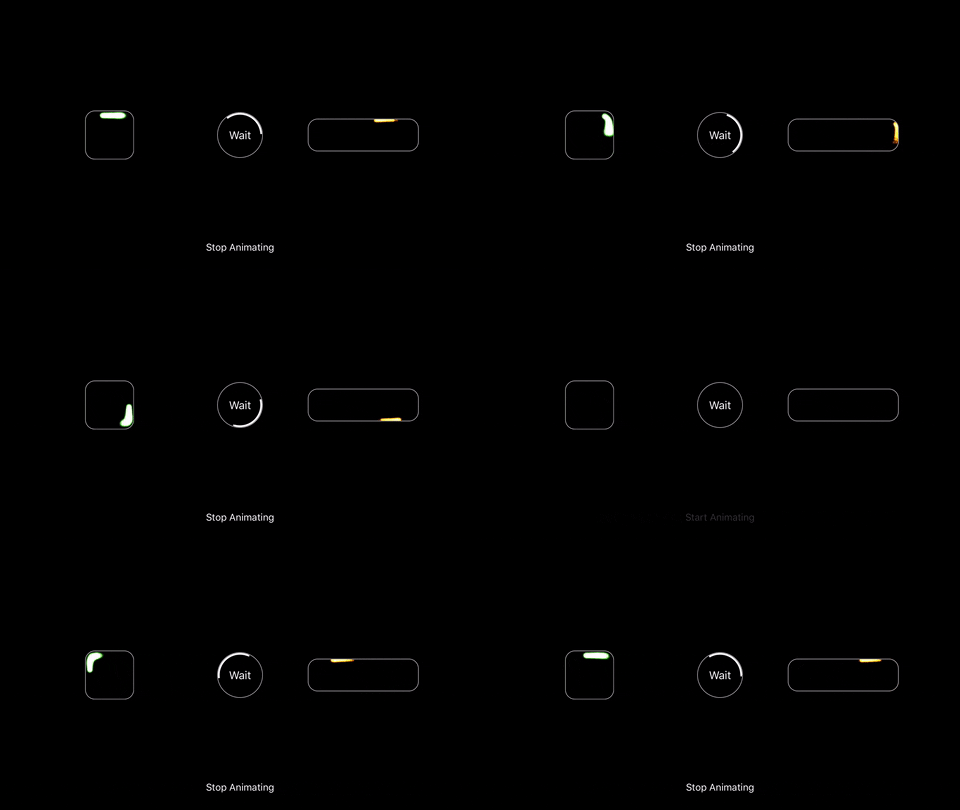
With ParticlesLoadingView you can create your own amazing SpriteKit particles animations with the Xcode’s built-in Particle Emitter Editor that looks like the following picture. Go ahead and create your own particles animation by doing File ➡️ New File ➡️ iOS Resource ➡️ SpriteKit Particle File.

Usage
To see it in action, run the example project, clone the repo, and run pod install from the Example directory first. The example project shows how to set up ParticlesLoadingView in a few different ways.
The easiest way to add a particles animation around the border of any UIView subclass is to use the extension method as follows:
                                                let view = … // Your UIView subclass here

view.addParticlesAnimation(effect: ParticleEffect.Fire) // Use a built-in effect

view.addParticlesAnimation(emitter: emitter) // Use your own SKEmitterNode
You can also use the already provided ParticlesLoadingView class to create an animation. Instantiate it by code or in Storyboard and select a built-in ParticleEffect or set the scene.emitterNode to your custom SKEmitterNode object.
                                                var loadingView: ParticlesLoadingView = {

let view = ParticlesLoadingView(frame: 0, y: 0, width: 75, height: 75))

view.particleEffect = .Spark

view.duration = 1.5

view.layer.cornerRadius = 15.0

return view

}()
// OR provide your own SKEmitterNode
let emitter = NSKeyedUnarchiver.unarchiveObjectWithFile(NSBundle.mainBundle().pathForResource(“Spark”, ofType: “sks”)!) as? SKEmitterNode

if let emitter = emitter {

loadingView.scene.emitterNode = emitter

loadingView.startAnimating()

}
Customizations
                                                /// Duration in seconds of the animation to complete a tour on the border of the view.

public var duration = 2.0
/// The size of each particle image. This value is used to calculate the inner padding of the view path so that the emitted particles are visible.

public var particlesSize: CGFloat = 5.0
/// The emitter of particles that is animated along the border of the view.

public var emitterNode: SKEmitterNode? = nil
You can provide your own particle emitter node by designing an animation with the particle emitter editor and creating a SKEmitterNode. If you want to customize it further than that, the project is documented so go ahead and 🍴 it.
If you think a feature should be included in this project, submit a PR or open a new issue.
Installation
ParticlesLoadingView is available through CocoaPods. To install it, simply add the following line to your Podfile:
pod “ParticlesLoadingView”
You can also use Carthage if you prefer. Add this line to your Cartfile.
github “BalestraPatrick/ParticlesLoadingView”
Requirements
iOS 9.0 and Swift 3 are required.
If you are using Swift 4, please use the swift4 branch.
If you are using Swift 2.3, please use the swift2.3 branch.
GitHub
- August 27, 2025
- SwiftUI
This package provides you with an easy way to show tooltips over any SwiftUI view, since Apple does not provide ...
- August 27, 2025
- SwiftUI
- Uncategorized
SimpleToast is a simple, lightweight, flexible and easy to use library to show toasts / popup notifications inside iOS or ...
- August 27, 2025
- SwiftUI
Create Toast Views with Minimal Effort in SwiftUI Using SSToastMessage. SSToastMessage enables you to effortlessly add toast notifications, alerts, and ...


